12 August 2010

More From The Project Desk

Thought that we'd take another look at the artillery and crew that we were painting in the last post.


Seen to the left just prior to them receiving their last wash before being sprayed with a finishing coat to protect them. 


Once again seen to the left on the incline.

I am happy with them though not having painted since last winter has certainly taken its toll of my ability to produce a good paint job.  A bit like my old school report which read .."a bit more effort required, can do better".

Whilst waiting for the artillery crew to dry, I once more rummaged through my Troop reinforcement box (aka fishing tackle box). There sitting most forlornly were some Armoured currasiers which I had purchased in my previous shipment from Perry Minatures.

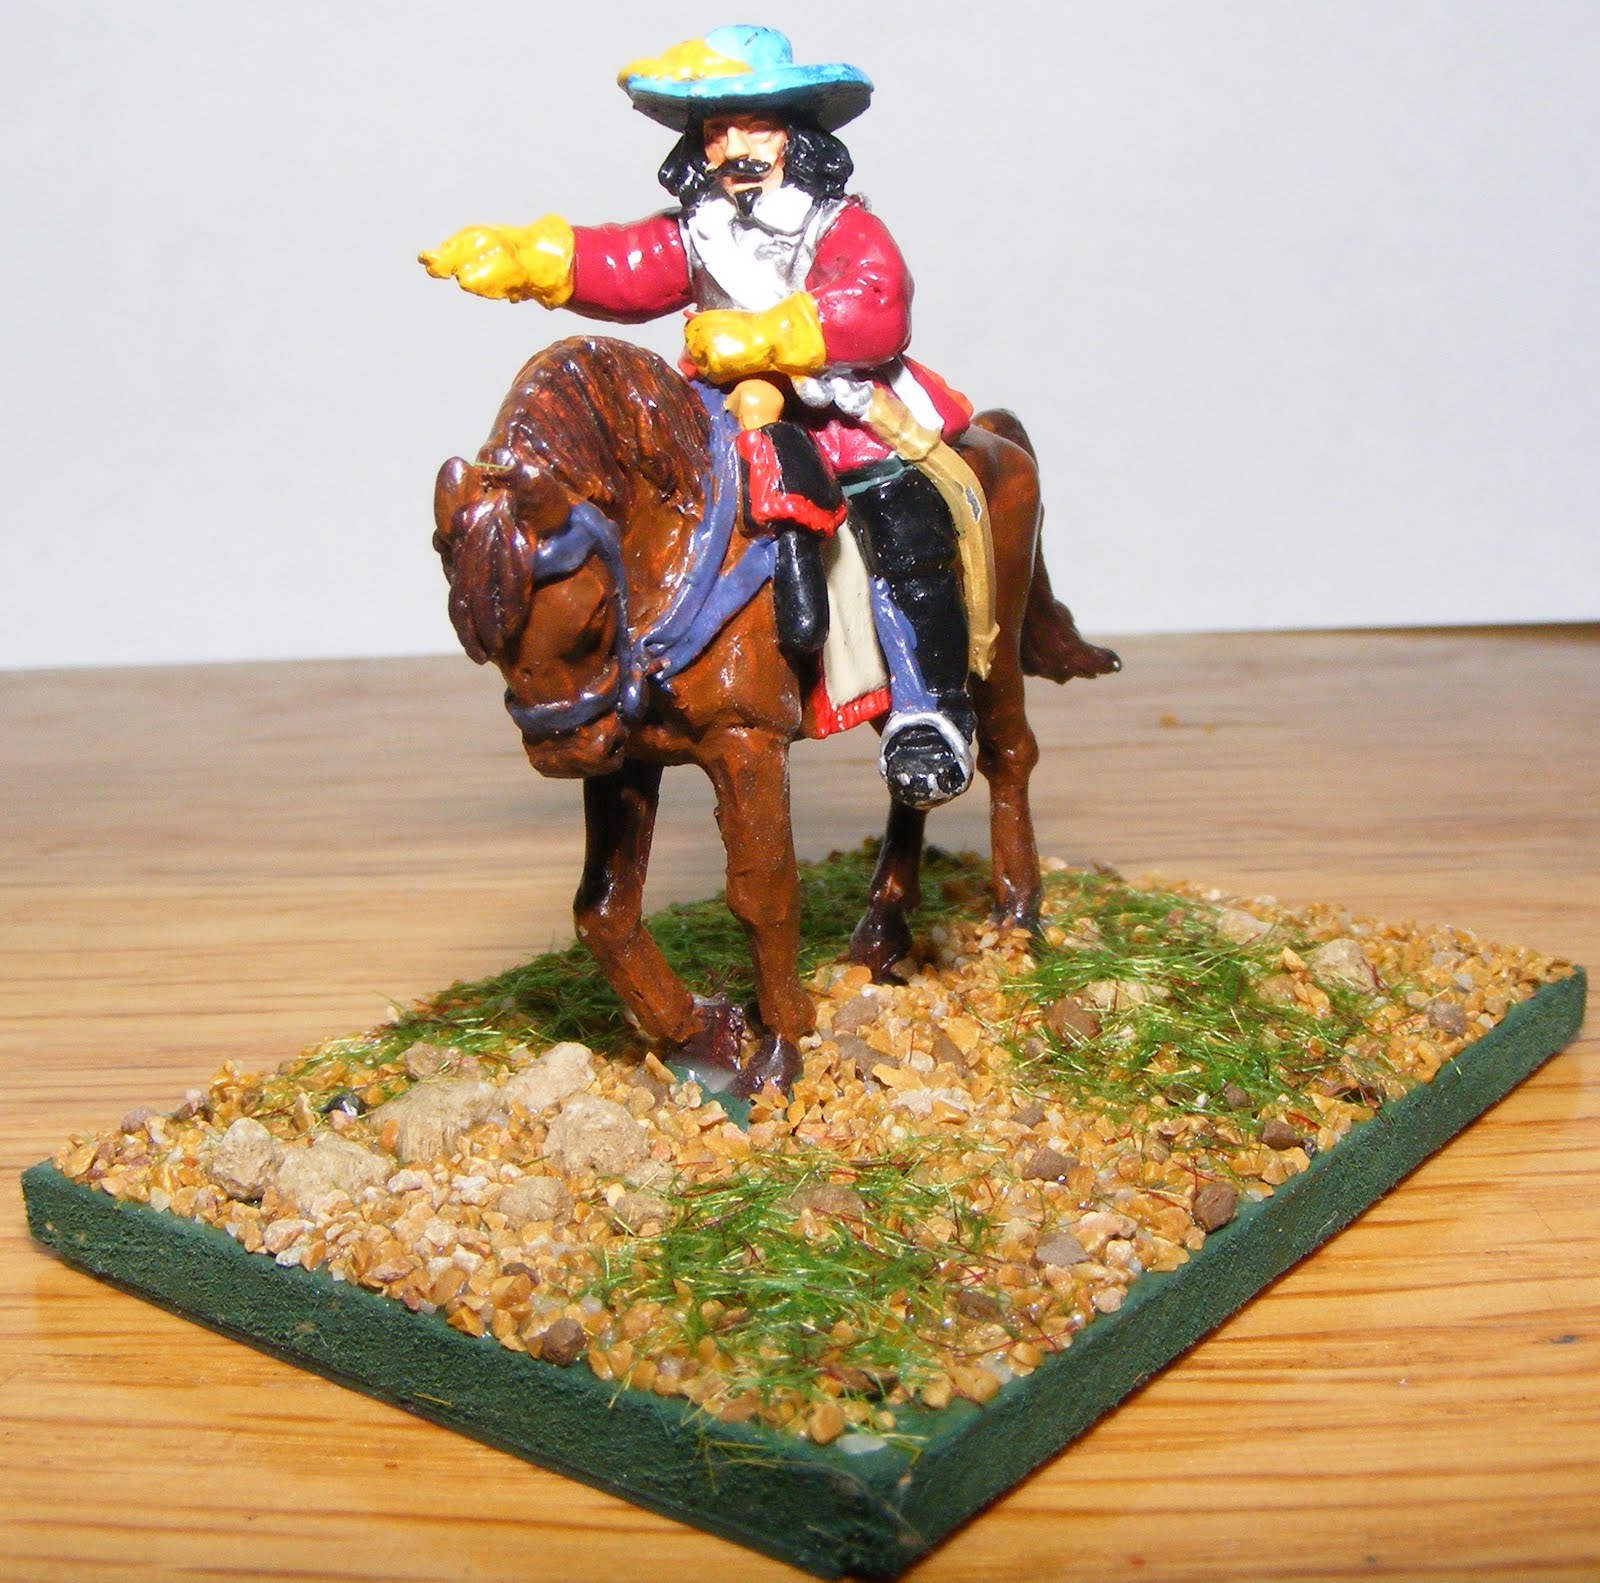
I had intended to paint them up as a couple of units of early war lobsters. But for some reason concentrated on the regular cavalry for each side.  Shown to the right is a trooper, Officer and standard bearer.


The currasiers should be finished quickly, though can't say the same for their mounts.

Neil W

7 August 2010

On The Project Bench 2.

Once more we head to the project bench and see whats been happening over the few weeks since the last post. Having discussed the need and desire to start painting the new Scottish Horse and Dragoons in the last post I have in fact started painting some artillery which had been sitting in the queue for some time.

Artillery crew.
It had become apparent to me that there was a need for some more guns in our games other than the two light guns that at present make up our artillery train. The other motivating factor was that really they should be quicker to paint and finish than would the Scottish Horse and Dragoons. As the date for our departure to Europe and our Holiday Trip is fast approaching I didn't feel like leaving a job half finished.

There are four guns in total, each being rated 9 pounders. Each has a crew of four some of which is pictured at right. My method of mounting the troops on short pieces of  Dowel using blue tack is also illustrated here. I don't know the effectiveness of this type of mounting with 15mm or smaller troops, but with 28 mm and larger I think its a fine method of handling and painting the troops.

As can be seen I prefer white undercoat rather than the black that many use.  It does take a bit longer to paint and you can spot any areas that you might miss. However I prefer the brighter colours that the white undercoat seems to produce. I use Skull White in the spray can by Citadel and generally find it an effective paint. All paint used is a combination of Citadel and Vallejo paints, although the Vallejo is becoming increasingly hard to get.

When completed I wash all the figures using the set of washes from Citadel. The wash adds that little touch to your troops and really highlights the paint job that you have just completed. A really good idea if you are interested is to buy the bulk pack of washes from Citadel. They can also be purchased individually.

Left is pictured one of the big guns. Painted and awaiting its wash prior to being sprayed in a gloss finish to protect it from the ravishes of both time and being handled. It will belong to the Scottish contingent. I may not have painted the Scottish horse or Dragoons, but I did get their artillery done.


Pictured right is an example of the other three guns I have completed. I have deliberately painted them in an eclectic style so that they can be used on either side of the conflict.

Though largely ineffective against troops and slow firing on the battlefield they certainly look good with the smoke amongst your troops and they come into their own against walls, buildings and other defences. They'll make a wonderful addition to either the Royalists or Parliaments artillery train.

Neil W

15 July 2010

On The Project Bench.

Like most other Hobbyists, wargamers tend to collect a lot of lead that they put aside for a rainy day. I'll paint it when I get around to it, seems to be their usual answer when asked. It reminds me of a famous occasion in my Model Railway club many years ago. We had a member who would always put jobs off saying that he'd do it when he got around to it. So the club layout suffered as a result. Until one day the club President so incensed by his constant shirking went home and created a round piece of plywood to which he printed on it "TOIT". At the next meeting when the member attempted his usual answer the President pulled out his creation and having presented it to him said "now that your have your round toit there is no more excuses for not working is there?"

Speaking of which. I had a brain fade the other day and decided that I needed a larger contingent of Scots within the parliament army. I had for the sake of variety Painted a unit of pike using the Perry Brothers ECW Scots figures. Also on the paint desk nearing completion was two sleeves of Scottish shot. This stalled with the arrival of spring, the better weather and those tasks that DW had organised for me to do over the summer.

With the arrival of the cold winds of June, I returned to the fray and decided to expand my Scottish contingent. In addition to the Unit of Pike and two sleeves of shot I decided that we needed two units of Horse, a unit of Dragoons and a piece of ordinance to round off what should be a handy little force.
I promptly ordered my new recruits. Just as promptly they arrived with in five days of ordering them from England. Possibly a new record.

Pictured right is a foot command set. It comprises of Officer, standard bearer and musician which in this case is a piper. There are six figures per set being two officers, standard bearers and two musicians being a piper and drummer. They are moulded in animated and realistic poses and carry on the excellent standard that we have come to accept as the norm with the Perry brothers minatures.

They can be seen mounted on my spray stick, which is a piece of timber aprox 20mm x 15mm and about 400 mm long. They are held on using Blue tac which I have always found to be adequate for the purpose. When ready for painting I transfer them onto a round piece of  Dowell approx 18 mm by either 40mm or 50 mm long. I use blue Tack to hold them to the rods and have not had many problems of the figure falling off when being painted. I believe that the round dowell gives me the benefit of being able to rotate the figure as I paint therebye making it easier to paint continuously.

Now all I need to do is find the time to paint them. What with our trip to Europe later this year I guess I'll just have to do it when I get a round to it.

Neil W

20 June 2010

Its Winter and its wet.

Today I decided to continue on with what is probably the least appreciated task that most war gamers ever have to do. Namely decorating the bases of their troops.


Its really amazing the number of times we see a good collection of figures, with absolutely museum quality painting on bare undecorated bases, or whats worse, in my opinion, on painted bases only.

I guess with my background in Model Railroading its comes naturally that there is a compulsion to "Finish" off a model to set it up in the best possible way, like on a stage if you like. Now my figure painting is far from perfect... even very good, but I paint the way I like and take the same attitude to the way that I decorate (Flock) their bases. So I thought that I would show the method that I employ to decorate my troops.

All materials that I use are commercially available from the scatter materials sold as "Citadel" from Games Workshop. I also use some of the Woodland Scenics scatter and Talus (Loose rocks). Woodland Scenics is a producer of Model railroading scenery products and are available from all Hobby shops.

I tie them all together with Selleys "Aquadhere" which is a PVA wood glue that dries clear, is non-toxic and cleans up in water. I can't stress that the drying clear is a major plus for this type of glue. There are other glues but test them first, make sure that they dry clear. The other advantage of Aquadhere is that it is paintable and retains the paint cover when dry. The glue also can be diluted if required and retains its strength when used in this manner.
All bases used for the troops are 3 mm Craftwood. All figures are fixed to the bases with Aquadhere and then painted with an acrylic green cheap paint which helps hide those little gaps that can occur and would otherwise ruin a good base job.


The first thing we need to do is to apply a Liberal amount of glue on the base and spread it around and over the bases of the figures. By applying more glue than you need, you can help hide the mound that is inevitable when the figure is glued to the base.


I use an old brush to spread the glue and are very careful not to paint more than the figures feet. This is an important stage and shouldn't be rushed as it forms the layer on which the scatter is applied and ties it all down to the base. I keep the brush in water between bases and though a lot slower I only do one base at a time.


This is the time to apply large objects such as rocks twigs or bushes as they usually need a fair amount of glue to lock them into position.


We now apply the first scatter. Which in this case is stones and some fine sand. I have scattered it in a seemingly random fashion but not covered the whole base.


I now apply small bushes to the base. Here I have used Woodland Scenic Coarse Turf (T63). Once more it is important to secure larger scatter to the full strength glue.


I now scatter using my fingers the remaining grasses and the such to achieve the desired effect. I then apply the light puff test to help dispel any loose material from the base. Better now than when gaming. When complete I set aside the base to dry naturally. It usually takes about 2 hours to be dry to the point of allowing them to be moved with little chance of disturbing the finished base. However I prefer to let them rest over night.


Another example of a finished base. It should be remembered that these photo's depict a still wet base and that over time the white that can be seen will turn to clear as it dries.

Here are the four bases that make up the regiment.
Care should always be taken to have as much as possible a fairly similar look over the bases of the same unit. However different units can vary to give your army variety.


Anyway four bases down and another thirty to go. That is how I do my bases. I hope it enthuses you to get your unfinished bases completed, especially on these wet Winter days

Neil W

18 June 2010

The First Step .....


As Confusious said "A long trip starts with but the first step".

So folks here goes.
I Guess a little about myself first.
I am an avid war gamer who follows the ECW period and who, for the most part, is a supporter of the King. I hope to show my motley collection of troops and some encounters that have occured from time to time.
I mostly these days model in 28mm which is a lot easier on my poor old eyes, though I do have ECW, Ancient Greeks, Dark Ages Byzantines and ACW in 15mm.

Predominantly all ECW figures seen here will be metal figures from the Perry Brothers (no relation) ECW range.
Hope that you all enjoy my blog .

Neil W